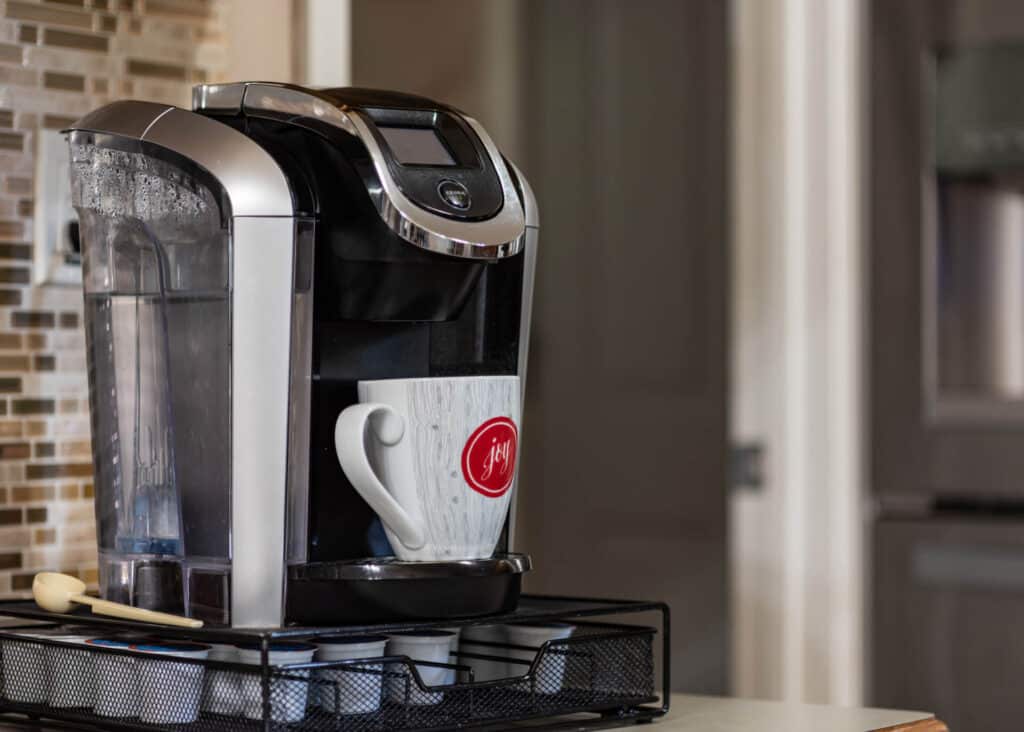
You’re running late for work in the morning, and all you want is a shot of caffeine. So, as usual, you pop a coffee pod into your Keurig, but nothing is coming out this time. Meanwhile, the screen of your Keurig says “PRIME.”
But how do you prime a Keurig?
Fear not! Priming a Keurig coffee maker couldn’t be simpler, and there is a big chance it won’t take more than ten minutes.
What does it mean when it says “Prime” on a Keurig?
Some Keurig models display the message “Prime” in the text on the screen. On other Keurig models, the “Add Water” and “Heating” lights flash simultaneously.
If your Keurig displays a Prime error message, your machine fails to dispense water from the reservoir correctly. Possible reasons include a misaligned water reservoir, needle clogging, or lime scaling.
You usually can’t ignore a Prime error, as the machine will not brew coffee in that state. However, if somehow your Keurig lets you brew coffee despite the Prime message, you still need to find out the problem, as continuing to brew coffee in that state could damage the machine.
Read on to find out the possible reasons why your Keurig is displaying a Prime message. Most of the options are things you will be able to fix yourself, so keep reading to get the simple instructions.
The water reservoir is not aligned
One of the reasons your Keurig does not work can be that its water reservoir may not align with the coffee machine. It can come out of alignment for several reasons. For instance, you may hit it out of place when moving your Keurig around the house or cleaning it.
Checking if the water reservoir is in place is quick and straightforward. It is a great starting point when troubleshooting the Prime error on your coffee maker.
Dirty water reservoir
Making it a habit to clean the water reservoir of your Keurig at least once a week can prevent the Prime error message from appearing in the first place. As an added benefit, this will stop bacteria and mold from building up inside the machine.
It would be best to clean the water reservoir with soft dish soap, water, and a non-abrasive cloth. Rinse it thoroughly to remove all soap, and let it air dry.
Lime scaling
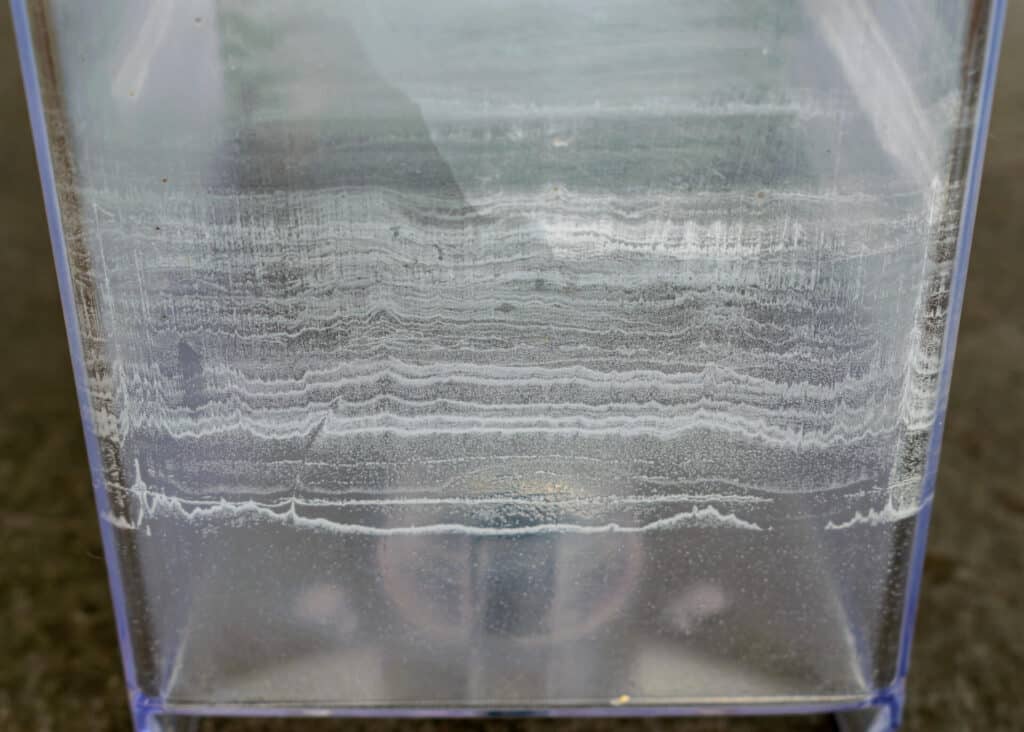
Lime scaling due to the excess mineral content of hard water can cause many household gadgets to malfunction, and your Keurig coffee maker is no exception.
If you don’t clean your Keurig machine, calcium and limestone sediments can build up and obstruct water from getting through to the coffee pod. So even before you get the Prime message, your Keurig may begin to deliver weak and watery coffee due to lime scaling.
Keurig sells a descaling solution that makes it simple to flush the unwanted calcium deposits from your machine. The descaling solution comes in either a liquid bottle or a powder pouch. You pour the descaling solution into your device, add water, and run several water-only cycles with no K-Cup to flush the machine. The number of water-only cycles needed may vary based on the model of your Keurig machine.
Keurig recommends descaling the machine every three to six months. Depending on your Keurig model, your device may also have a light that comes on or an error message to alert you to the need for descaling.
If you live in an area known for hard water, you may need to descale your Keurig more often than every three to six months. You might also be able to reduce the need for descaling by using distilled water to brew your coffee.
How do you prime a Keurig?
Here are five methods for how to prime a Keurig coffee maker. These methods should cover all the problems you could encounter. In addition, they are all easy to do and will require minimum effort on your part.
Go through each method to see if you have fixed your problem. It can be hard to diagnose where your coffee machine is going wrong, but you should solve every possible problem with your coffee machine by completing every technique.
Unplug and reattach the water reservoir
When your Keurig says “Prime,” check first for the problem that is easiest to fix. For example, the water reservoir being in the wrong spot can cause an error message to display. However, you can put a misaligned water reservoir into place in a matter of seconds, so try addressing this before you move on to anything more complicated.
Here’s how to reattach the water reservoir:
- Remove the water reservoir. All you need to do is grab both ends of the reservoir and pull up firmly. It should easily come off of the base.
- Reattach the water reservoir. Yes, it’s that simple! Just make sure that it is secure at the base when you reattach the reservoir, and no air bubbles appear in the water.
Misalignment can happen for several reasons, and checking for it should always be your first port of call if a Prime message appears on your coffee machine. It really can be that simple to prime a Keurig!
Clean the water reservoir
The water reservoir in your Keurig can get dirty, which may also provoke the Keurig Prime error to display. Unfortunately, the reservoir is not dishwasher safe, so you must wash it by hand.
Here’s how to clean the water reservoir:
- Remove the water reservoir from your Keurig. It is best to hold both sides of the reservoir and pull it up.
- If your Keurig model uses a water filter, remove the water filter and set it aside.
- Use a damp cloth to clean the sides of the water reservoir. Use soft dish soap for the best results. Clean gently to avoid scratching the plastic of your reservoir.
- Let the reservoir dry. Air drying is best, as towels often contain lint that can make your reservoir dirtier than when you started. Leaving it to dry overnight is a great idea.
- Place the reservoir back in your Keurig. Insert the water filter first if appropriate. Make sure the reservoir aligns with the base of the coffee machine. If inserted properly, it should click into place.
- Run a couple of water-only cycles. It will help clean the reservoir further by eliminating any debris you missed.
It is recommended to clean the water reservoir once a week. Regular cleaning will help keep your Keurig coffee free of bacteria and mold, and your coffee will taste good.
If you want to clean your coffee maker, some coffee lovers swear by a vinegar flush for their machine. Check your Keurig’s warranty first to ensure this does not void it. If your machine is more than a year old and not under warranty, go for it.
All you need is white vinegar and water. Do not use other kinds of vinegar like balsamic or apple cider vinegar, as they are more likely to create than remove debris in your machine.
- Fill the reservoir halfway with white vinegar. Add clean water the rest of the way to the fill line.
- Run a brew cycle with a mug in position on the drip tray, but leave the K-Cup holder empty. Repeat this process until you have used up the mixture of vinegar and water in the reservoir.
- Run multiple water-only brew cycles until you have thoroughly rinsed your machine.
Vinegar should have some descaling effect in addition to basic cleaning, though it might affect the taste of the coffee more than Keurig’s proprietary descaling product does. Make sure to rinse the machine thoroughly after using vinegar, or your coffee will have an unpleasant aftertaste.
Whatever your preferred method of cleaning the reservoir might be, you may also need to think about how the reservoir got dirty in the first place. For example, debris accumulating on the filter screen or in the water filter can pollute the water in the reservoir, so you should look at whether that contributes to your problem.
Some Keurig coffee makers models allow you to use a water filter, a cylinder that stands inside the water reservoir. These water filters can be a great help if the water in your area is prone to calcium deposits or excessive chlorine. However, they have cartridges that need to be changed regularly. So if you feel like the water in your Keurig’s water reservoir is getting dirty more quickly than it should be, you may need to replace the water filter cartridge. These charcoal cartridges are intended to be replaced every two months, or if you don’t use the Keurig daily, every 60 tank refills.

Clean the filter screen
The filter screen is located at the bottom of the water reservoir, where the water reservoir connects to the machine’s base. Regularly cleaning helps keep your Keurig coffee fresh, smooth, and, most importantly, safe. Though the Keurig uses hot water to make your coffee, eventually, water cools and collects on the filter screen, and bacteria and mold can grow there over time.
You may need to clean your filter screen when filling your cup of coffee takes longer than usual. A dirty filter screen can also cause the water in the reservoir to become contaminated, which may diminish your coffee’s taste.
However, these subtle signs may be easy to miss if you focus on other things while making and drinking your cup of coffee. Fortunately, the Keurig Prime message can alert you to this problem definitively.
Cleaning the filter screen is probably easiest to do while you are already cleaning the reservoir with the usual soapy damp cloth. Here are a few ways you can get the filter screen clean:
- Direct your sink’s faucet to the filter screen and run water full force. If you have a sprayer on your sink, use that.
- Fill the reservoir with about two inches of clean water and gently shake it back and forth.
- Use a cleaning brush to scrub the filter screen clean.
However, you clean the filter screen and rinse the reservoir thoroughly with clean water afterward, as you do not want to wind up drinking the debris you just loosened. You may be better off cleaning the filter screen at the beginning of your reservoir cleaning process rather than at the end.
Clean the needles
The needles puncturing your K-Cup’s foil are an overlooked part of your Keurig machine, but they can also be the reason for a Prime error message. Bits of wet coffee grounds may get stuck in your brewer’s entrance and exit needles, and this obstruction will prevent water from dispensing.
Some Keurig users use reusable mesh baskets that hold the coffee grounds of their choice instead of the traditional foil-topped K-Cups in their machines. While these reusable mesh filters make your Keurig more eco-friendly, they are often produced by third-party manufacturers, and some are better than others at keeping the coffee grounds inside the basket where they belong. In addition, if you use this reusable K-Cup, you may need to be attentive to the possibility of debris around the needles.
You only need a paper clip and some cold water to clean the Keurig needles. The whole process shouldn’t take you more than ten minutes.
- Unplug the coffee maker from the socket.
- Lift the handle of your Keurig and remove the pod holder. It should slide right out.
- Remove the funnel from the holder by pulling on the sides until it detaches. It can be tricky, as the funnel is usually pretty tightly held in the pod holder.
- Straighten one end of a paper clip.
- Locate the tube on the underside of the pod holder. Use the paper clip to clean it. Wiggling the paper clip will help loosen clogging and remove coffee particles.
- Clean the pod holder and exit needle under the running water.
- Clean the entrance needle. Locate it under the brewer’s head. You will see two holes in the needle that you have to clean.
- Reassemble the pod holder. Use two hands to click the funnel back into the pod holder by aligning the side slots. Snap the funnel and holder into place by pushing the top rim.
- Plug in and turn on the Keurig.
- Place a mug on the drip tray. Run two water-only brew cycles using the largest cup size. It will help to flush any remaining grime from your Keurig machine.
While proactively paying attention to the needles of your Keurig may save you the frustration of getting a Prime message at an inconvenient moment, a piece of debris can get stuck on one of the needles at any time, so you cannot always prevent this problem in advance. Fortunately, it is easy enough to fix.
Call customer support
If the instructions above did not successfully remove the Prime error message on your Keurig machine, you could contact Keurig customer support for additional assistance. Customer support can carefully talk you through potential fixes for your Keurig machine.
If even that does not resolve the Prime error, the Keurig customer support representative may be able to assess whether they can repair or replace your machine under warranty. Keurig machines usually have a one-year warranty, but Keurig may ask for your receipt to prove that you bought your coffee maker less than one year ago.
If Keurig determines that they can repair your machine under warranty, they may provide you with an Authorization to Return (ATR) number that you need to include when shipping your device back to them. Do not ship anything to Keurig without an ATR number.
Getting a Keurig Prime error can be an opportunity for you to learn more about the correct maintenance of your coffee maker. However, some Prime messages cannot be prevented in advance, as the reservoir coming out of alignment or a clump of debris sticking to a needle may happen at any time.
However, whether or not your Keurig says “Prime,” carrying out a regular cleaning routine can improve your machine’s overall performance and longevity. For example, you may want to set up recurring reminders on your phone’s calendar to clean the reservoir once a week, visually inspecting the filter screen each time to see whether additional cleaning is needed there. You could also remind yourself to run a descaling process every three to six months, though the notifications on your machine may also let you know when that is needed.
For now, though, these instructions for fixing Keuring Prime messages should help you get your cup of coffee and get on with your morning.