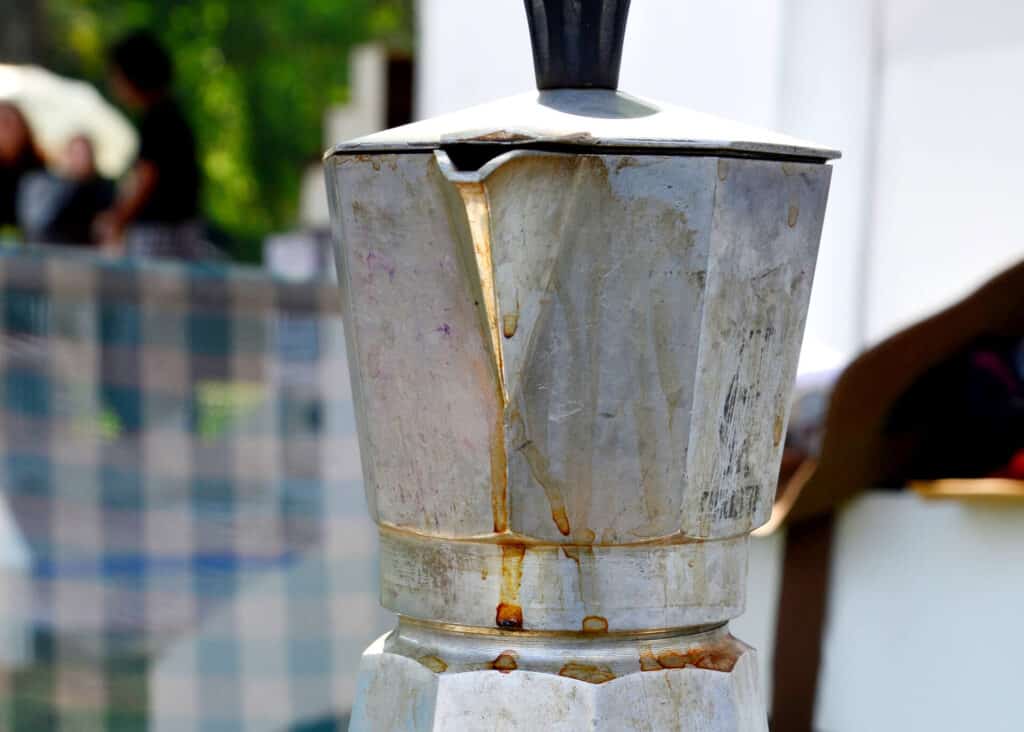
Operating a Moka Pot seems simple: you add ground coffee and water, pop it on the stove and enjoy nice strong coffee a few minutes later. But then, one day, you witness a bubbling, dripping mess on your stovetop. If you notice a Moka Pot leaking, it’s one of the most obvious signs that your coffee maker requires some attention.
Why is my Moka Pot leaking?
The most common places a Moka Pot leaks are at the threads joining the two chambers and the pressure valve.
The basic design of a Moka coffee brewer includes two chambers that screw together. A coffee filter basket sits on top of the water chamber, with the funnel extending into the water. Coffee grounds go in the basket.
Then, the upper chamber, which has a rubber seal at the bottom, screws on top of the boiler chamber. The water will boil when the coffee maker is heated on a stove burner. The steam then pushes water upward through the coffee grounds in the filter basket. Finally, brewed coffee reaches the top chamber.
Moka Pot leaking from the middle can mean that the two chambers are not screwed together tightly enough. It is especially likely if you are new to brewing with a Moka Pot.
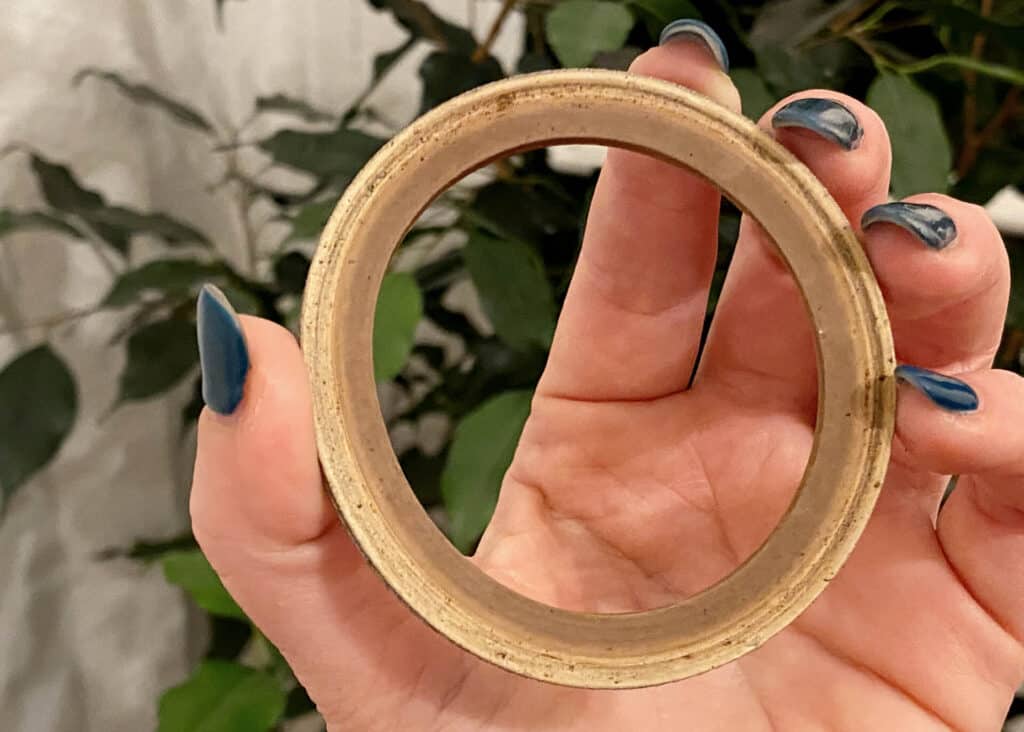
If you’ve been using your Moka Pot for a long time, it might mean the rubber gasket around the bottom of the upper chamber has reached the end of its lifespan. It likely needs replacement, as it can no longer form a tight seal.
The pressure valve is a hole in the bottom part of the Moka Pot that prevents pressure from getting too high when you boil water in there. If you fill the lower part above the pressure valve, you will likely experience a Moka Pot valve leak. It happens because the excess water will drain out from the pressure valve.
Another potential cause of a leaking Moka Pot is a clogged pressure valve. It is a bit more serious, but it is often fixable by thoroughly cleaning once you know the issue.
How to prevent a Moka Pot from leaking
Diagnosing a leaking Moka Pot can require asking questions about every step of the brewing process. This includes issues you might not remember when you think of a coffee brewing method, like grinding your beans and keeping your equipment clean.
1. Check if the parts are screwed properly
The easiest way to stop your Moka Pot from leaking from the middle is to ensure there is no gap between the top and the bottom chambers. You may need to use more force than you think is necessary to tighten them, especially if you are new to brewing with a Moka Pot.
Checking if the chambers are screwed on tightly can be challenging if you pour hot water into the boiler chamber. In that case, your Moka coffee maker is too hot to handle with your bare hands as you are screwing it together. So use a kitchen towel or a potholder to protect your hands from the heat, and then tighten the top and bottom parts as much as you can.
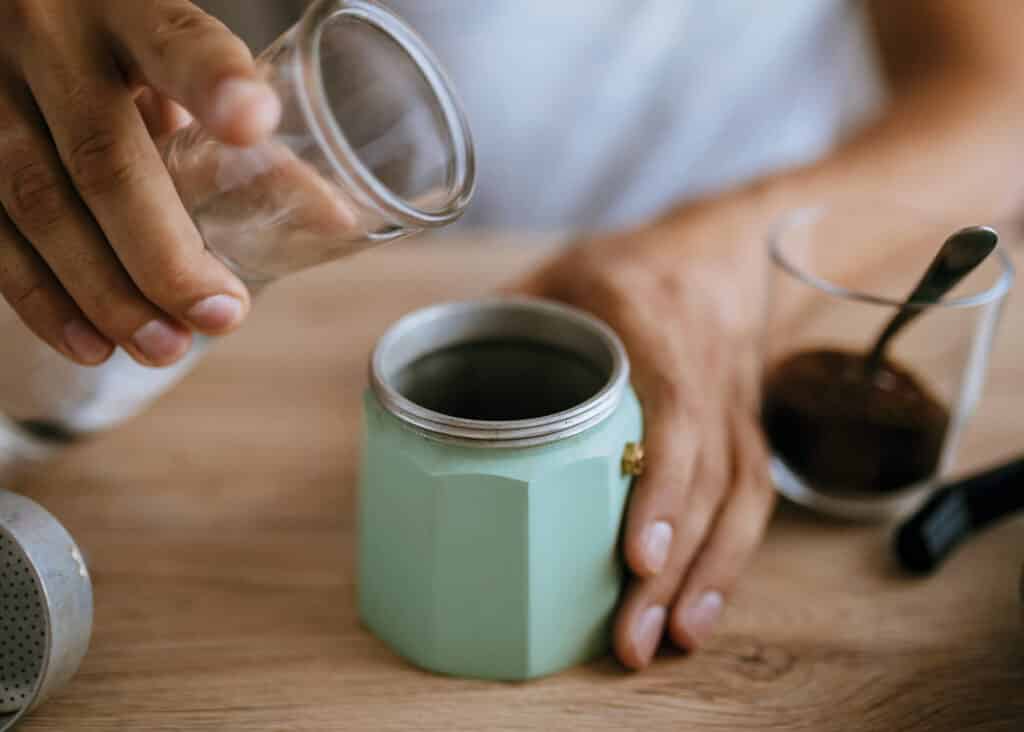
2. Don’t overfill it with water
A prominent part of the Moka Pot’s design is typically the pressure valve on the side of the bottom chamber. Water can leak from this valve.
As frustrating as Moka Pot is leaking water, it’s a good sign that the safety valve is doing its job. Without it, excessive pressure could build up in the coffee maker while you brew, potentially causing a messy and dangerous explosion! To prevent this problem, always watch where the pressure valve is located in your Moka Pot’s bottom section, and fill no higher than that.
Even if you haven’t quite gone over the safety valve, too much water can lead to coffee bubbling over the top of the coffee brewer. While this isn’t technically a leak, it’s still likely to create a mess that needs to be cleaned in your kitchen.
To avoid spilling, keep the water level a bit below the bottom of the safety valve. Keeping the lid of the Moka Pot open while you brew coffee can also help you see what’s going on. Finally, take the coffee brewer off the stove burner before it bubbles out the spout.
That said, if you have a little bit of water left in the bottom when you’re done brewing, that doesn’t mean you’ve put in too much — it’s perfectly normal.
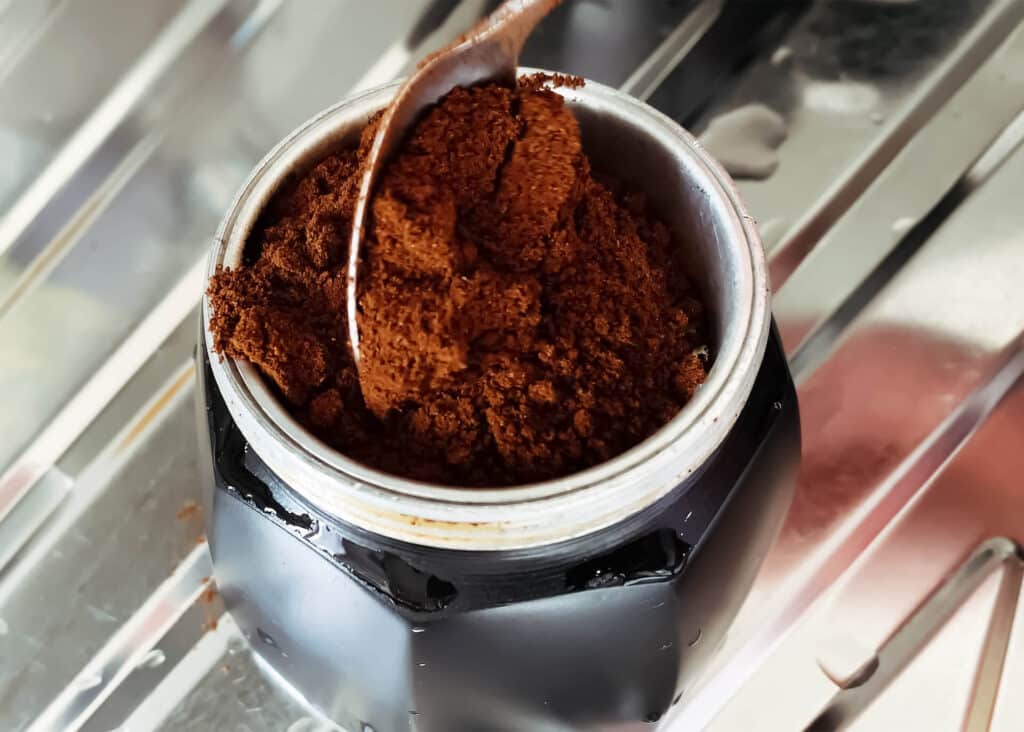
3. Don’t overfill with coffee grounds
If you like drinking a lot of coffee, you may be tempted to fill your coffee maker to the brim. However, you don’t want to overfill the Moka Pot with more ground coffee than it can handle.
A Moka Pot is known for brewing espresso-like coffee at home. So you might think you have to tamp down the coffee grounds in the filter basket like you would with an espresso machine. However, with a Moka Pot, that’s not a good idea.
Tamping down the coffee grinds in a Moka Pot will likely block the holes so that water can’t get where it needs to go, leading to Moka Pot leakage. Also, you want the grounds level but not compressed, so don’t pack them in.
You’ll know how much coffee to put in your Moka Pot when the filter basket is full but not heaped. Keep in mind that there should be space for water to flow through.
4. Don’t use a very fine grind size
While a Moka Pot is known for making espresso-like coffee, the fine grind size you’d use with an espresso machine is a no-go.
Coffee that’s too finely ground can block water movement through the coffee grinds. In the best-case scenario, you’d get burnt coffee full of bitterness. When water can’t get where it needs to go, you will likely have a Moka coffee pot leaking.
The ideal coffee for a Moka Pot is ground to medium-fine size, which is a little more coarse than espresso but a little finer than what you’d use in a standard drip coffee maker.
Grinding your coffee beans fresh is most likely to get you good coffee. If this isn’t possible, though, and you have to choose between espresso and regular grind, go with regular. It’s better to extract a little less taste than you could than to experience a blockage that causes a Moka Pot leak.
5. Don’t put milk in a Moka Pot
The big draw of a Moka Pot is the ability to make espresso-based drinks. Some people might think that you can pour milk directly into a Moka Pot’s bottom chamber to make a latte at home.
However, putting milk in a Moka Pot is a bad idea because it will likely clog your coffee maker. As a result, it may start leaking. To ensure your Moka Pot works properly, do not put anything other than water and coffee grounds inside it when you are brewing coffee.
As soon as you’ve poured coffee from your Moka Pot into a cup, you can add all the milk, sweetener, and other add-ins you want!
6. Replace the rubber gasket
The rubber gasket on a Moka Pot can degrade over time and need replacement. Especially if you’ve been using your stovetop coffee brewer for some time, you may want to inspect this crucial part for signs of wear.
Many prominent manufacturers of Moka Pots, such as Bialetti, sell replacement gaskets for their devices. That way, you don’t have to get a whole new pot if you have a Bialetti leaking due to one damaged component.
If you bought an off-brand Moka Pot to save money, you might find purchasing replacement gaskets and other parts more difficult. It can be important to consider if you are trying to choose between Bialetti Moka Pot and its cheaper competitors. Spending more on your initial investment can mean you don’t have to buy a new Moka Pot later.
7. Clean your Moka Pot regularly
A clog blocking the normal movement of water or coffee can cause Moka Pot leaks. While some ways to prevent clogging during the brewing process have already been discussed, clogging can also happen due to poor Moka Pot maintenance.
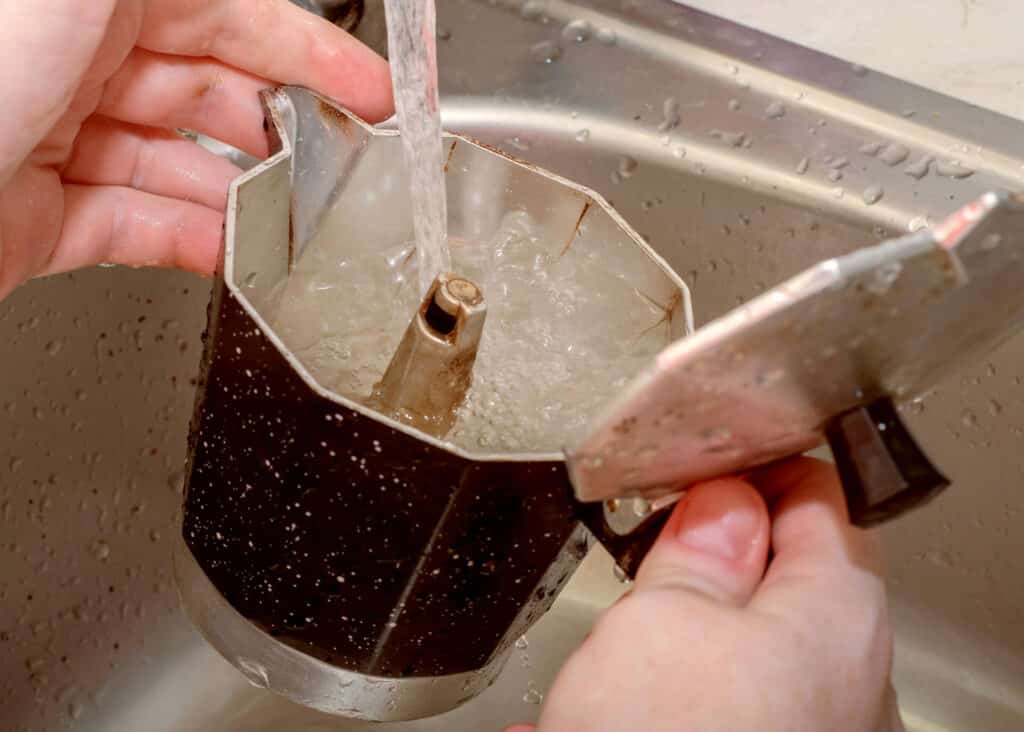
You can prevent a blockage in your Moka Pot by washing all the elements after each use. This will ensure that coffee oils and other debris do not accumulate and harden in an inconvenient place.
It might be as simple as a thorough rinse with cold water for an aluminum Moka Pot. Some stainless steel Moka Pots are dishwasher safe, and that’s an easy way to keep your Moka Pot clean regularly.
Either way, you may want to deep clean your Moka Pot periodically, especially if you have hard water that leaves mineral deposits. Then, you can run a brew cycle of diluted vinegar to descale your Moka Pot as needed.
Aluminum Moka Pots are limited in the cleaning products they are compatible with, as aluminum tends to oxidize at the slightest provocation. However, a stainless steel Moka Pot could also benefit from lemon juice as a cleaning agent.
8. Know when your Moka Pot is done for
A final scenario that could lead to a leaking Moka Pot, though it’s less plausible than most other reasons, is a crack in your Moka Pot. In that case, it will leak from the Moka Pot’s crack rather than the valve or the center.
When Moka Pot is brutally damaged, repairing it yourself is not the best option. Even if you could weld or patch the area, brewing coffee’s pressure would likely break open your fix. So get a new Moka Pot if something like this happens.
Another issue that could spell doom for your Moka Pot is if metal edges have bent out of shape in the area where the two chambers need to screw together. Although bending it back into place might seem simple enough, damage here will likely interfere with the threads lining up.
Worn threads that no longer tighten when screwed are also a good reason to get a new coffee brewer.
After reviewing these tips covering every step of your Moka Pot brewing process, you should know what caused the problem. Fortunately, most of the issues are fixable. But, hopefully, you’ve also learned some ways to improve your coffee-making technique that you hadn’t thought of on your own!